• Skip to primary navigation
  • Skip to main content
  • Skip to primary sidebar

Kinder Goat Breeders Association

KGBA

  • About
    • Who We Are
    • Frequently Asked Questions
    • Board of Directors
    • Past Board Rulings
    • Meeting Minutes
    • Blog
  • Kinder Goats
    • Kinder Breed History
    • Kinder Breed Standard
    • Getting Started
    • Notable Goats
    • Online Pedigrees
  • Members
    • Forms
    • Milk Test Program
    • Evaluation Services
    • Newsletters
    • Online Pedigrees
    • Resources
  • Breeders
  • Shows
    • Upcoming Shows
    • Winner’s Circle
    • Holding a Show
    • Virtual Online Shows
  • Youth Program
    • Youth Shows
    • Youth Profiles
    • Doe Chain

Recipes

~Vinigar Of The Four Thieves~

April 15, 2010 by Kinder Goat Breeders Association

Hello everybody!

Our family has started using the Vinigar of the four thieves. It is quite simple to make and works great for keeping away mites, ticks and flees just to name a few. It does help with flys but I have found for my horses it doesn’t help as much. The horses sweat quite a bit more than the goats so I think that is the only reason it doesn’t work as well on them. 🙂
Once we are done making it we dilute it half strength with water for using on our animals and ourselfs.
Note: Do NOT use internally!
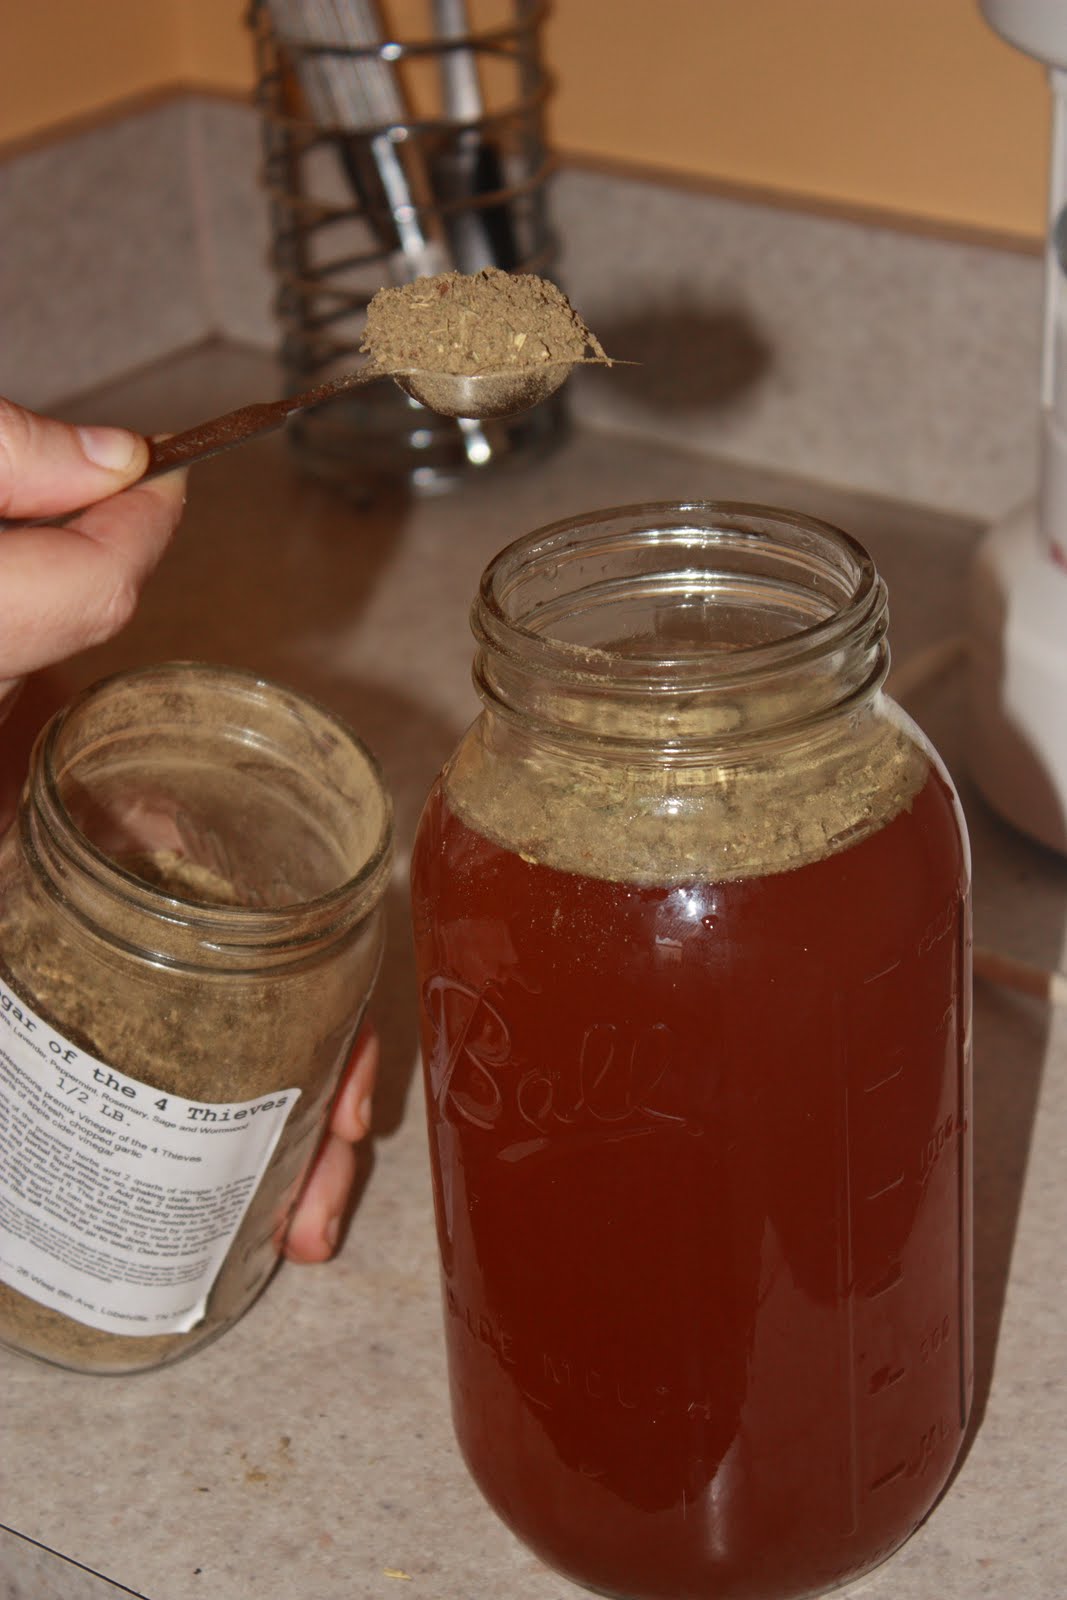
First, take your herbal mixture of Lavender, Peppermint, Rosemary, Sage and Wormwood, There are quite a few different recipes out there but most say to use equal parts and some add a few other herbs like rue, hyssop, and lemon balm. We purchase our herbs from the Bulk Herb Store and in their recipe for the Vinigar of the four thieves they only use the five herbs I have listed. Once mixed well measure out 12 tablespoons and place in your 2 quart jar of Raw apple cider vinigar.

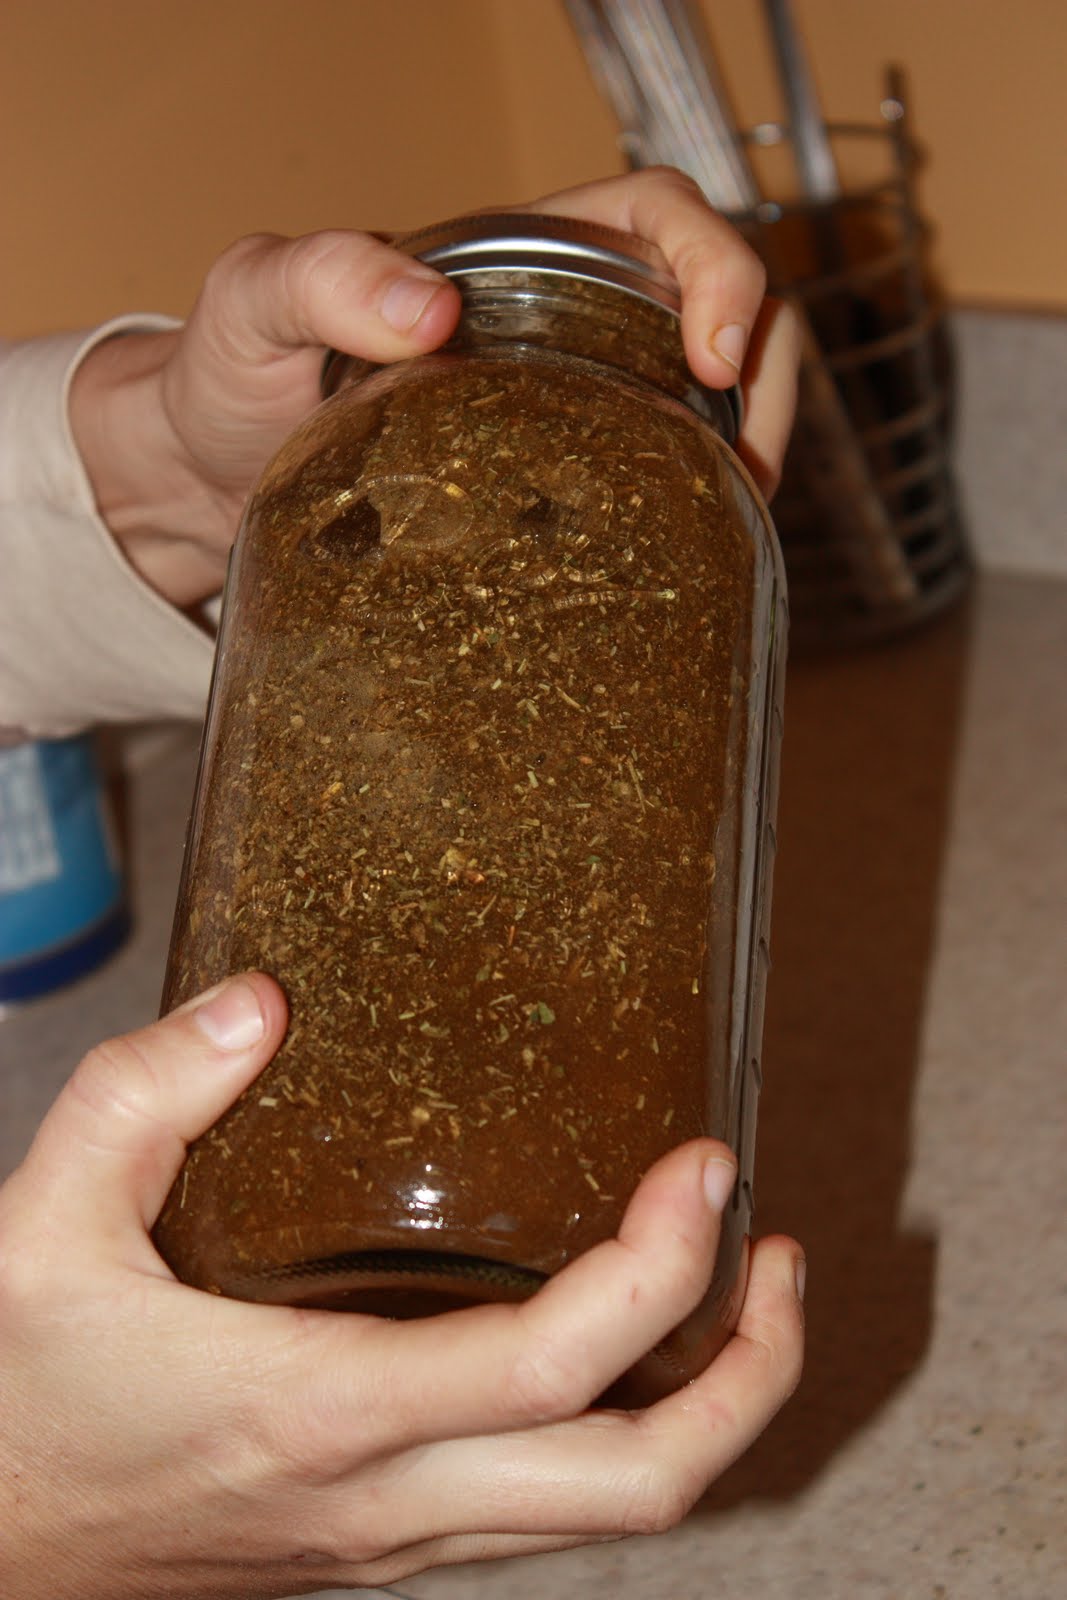
Shake then store in a cool dry place for 2 weeks.

After the 2 weeks is over, drain off all the herbs. Chop 2 Tbs. into the liqiud and put in a pot and steep for 3 days. Do NOT boil. If you cook it to fast it will make your house stink.

Once the 3 days are over strain off the garlic and store in your fridge until you need it.
I hope you all have a blessed day!
Until the whole world hears,
Bethany Joy Wood

Filed Under: Homesteading, Recipes Tagged With: Covenant Ranch

Cheddar

February 20, 2010 by Kinder Goat Breeders Association

I made cheddar about a dozen times last year. Most of them had a decent flavor but were too dry. I followed several recipes, and I’m not sure I have a favorite. Here’s a picture of one of them. with one edge cut off.
I am reluctant to put a recipe here because of copyright issues. So here is a link to a cheddar recipe http://www.cheeseforum.org/Recipes/Recipe_Cheddar.htm. I haven’t made this recipe, but the essentials are the same. Goat milk recipes usually recommend keeping things about 2 degrees cooler than cow milk recipes in all the temperatures. The cheese forum has a load of recipes. I just found this page and you might not need a book, just this place. It looks like it needs a thorough exploring. One nice thing about this recipe is that it calls for a gallon of milk instead of two, so you could make it with less milk, or you could double it if you have plenty of milk. It would need the smaller of the two molds that come with the Hoegger cheese press if one gallon of milk was used.

The first cheddar I made was done in a pot on the stove. That turned out to be very impractical, when you get to the part about raising the temperature of the curds from 86 or so to 100 or so no more than 2 degrees every five minutes. This is really hard to do on the stove, if not impossible. But I tried. We ate the cheese. The next time I did it in a sink of hot tap water, that was still too fast. It was about then I got the Weck style canner. That made all the difference in the world in terms of making it easier.

If you don’t have one, this should be done in a sink of hot tap water, and not as hot as it can be. In order to get anything to heat up that slowly you need a temperature outside the pot that is no more than 6 or 8 degrees warmer than what is in the pot. You can do the initial warming, up to the 86 or 88 degrees (F) on the stove, but this slow increase in the temperature just won’t work on the stove. In the sink you will raise the temp of the hot water slowly as the temp of the curds in the pot goes up.

This is the toughest part. And it gets easier after you do it a few times.

Cutting the curd takes a little figuring out too. You need a long narrow bladed knife, and some instructions, which you can find on the cheese forum also. I think you can find everything you need to know there.

All of these recipes and pages and lists say that cheddar and the other cheeses that are traditionally waxed, must be waxed. I don’t know if this is true or not. I waxed the first one, and it was pretty good for a first attempt, but it got mold under the wax. Waxing is not a simple thing. There are good directions for it that come with some of the wax when you buy it. But in the end it looks like it has to be dipped to be done well, not brushed on, and it has to be dipped more than once, and the wax has to be pretty hot. There are some volatility issues. It’s very messy. I am going to address this again this year.

But last year I packaged all the rest of it in foodsaver bags to age. Everyone, literally everyone, says this is unacceptable. Some of them say the cheese has to breathe, and can’t in plastic. This is surely true, but I don’t think it breathes in wax either. Most of the people who make cheese are rigorous traditionalists, and might not be willing to see such a big change. But I haven’t done enough of it to know yet if it will turn out good. This year I think I am going to vacuum seal half and wax half of the same batch of cheese to see what kind of differences there are. And I’m going to do it more than once. And maybe while doing that I’ll figure out that it isn’t as hard as I thought. But I have never dipped any.

Foodsaver bags aren’t always great either, sometimes you don’t get a good seal, sometimes there was still some whey coming out, most of the time it had to be redone at least once for one reason or another. But it didn’t get mold if the seal was good. Ever.

More about mold next time.

In the meantime, check out http://cheeseforum.org/

And have a wonderful day!

Filed Under: Homesteading, Recipes Tagged With: Jan Hodges

My experience with Camembert

February 13, 2010 by Kinder Goat Breeders Association

The first thing about aged cheeses is that you have to have a way to age them. I got a small refrigerator, I was lucky to find one that has no freezer, I don’t know how hard that might be to do now. Then I put an external thermostat on it to control the temperature. (Cheesemaking supply places have these.) The temp in a cheese cave needs to be higher than any refrigerator will stay. But it needs to be relatively constant. I think a freezer might be a better choice for this, because it doesn’t have two temperatures to maintain.

Another thing to think about is that if (when) mold from mold ripened cheeses gets loose in your cave, you will have a time getting rid of it. If you can ever get rid of it. I have a story about that for later. You might want to put off mold ripened cheese for this reason.

I have not made what I would consider a successful camembert. I love the commercial camembert I have eaten, and brie as well. Camembert is quite a bit easier to make, at least with the recipes I had at the time, (Home Cheesemaking, by Ricki Carroll) So I made camembert. I made it from pasteurized milk and also from raw milk.

I followed the recipe as carefully as I possibly could. Because I live in the desert, aging cheeses at the humidity levels required is very difficult. The humidity here is sometimes in single digits, and usually around 20%, you can get the humidity inside a little refrigerator up to about 45% with a pan of water. It needs to be over 90% for the mold growth you need for these cheeses. So they have to go inside a container inside the “cave”, and then you just hope for the best.

The camembert turned out looking like camembert, and it got “oozy” in the center, too runny at least once. I think that was from not getting enough whey out of it. It was more crinkly in the rind than commercial camembert, and had a much stronger flavor. It was a little too strong for me. My mother liked it a lot, I think her taste buds are going and it takes stronger flavors for her to really be able to taste things. It’s possible we should have cut it sooner.

I looked for a picture to link to, I haven’t got one, and I couldn’t find one, although I know I have seen them on the web.

I read the book “American Farmstead Cheese”, by Paul Kindstedt, about the processes involved in making cheeses. It has no recipes. It is an amazing book for understanding what happens to turn milk into cheese. I can’t claim to have understood it, but even so it was very helpful. It is very technical in parts. It also has some discussion about commercial cheesemaking. I’m going to read it again, after I get through “The Ruminant Animal”, which I got recently but have not opened yet. That looks really tough to me also.

Anyway, the Kindstedt book has discussion about raw milk cheese and bacteria, and provides some data. All raw milk cheeses that can be legally sold in the US must be aged at least 60 days. The bacterial levels after 60 days are much lower, for a variety of reasons. Camembert is ready sooner than that, and can’t be aged that long. So I got a little leery of it. But I’ll try again one of these days. We ate it and mother kept it for so long I had to take it away from her and throw it out, and no one got sick.

Kinstedt presents a lot of data about food borne illness from cheese, and it is very rare. Plus in almost all cases it was from cheese made from pasteurized milk in enormous quantities and was traced to contamination after pasteurizing. But next after that is the soft mold ripened cheeses like camembert and brie. Overall it seems to always come back to milk handling.

So I kind of recommend skipping to cheese like cheddar once you want to go beyond chevre, mozzarella, and ricotta. I will definitely try the soft mold ripened cheeses again, just not quite yet.

Next is cheddar.

Have a wonderful weekend!

Filed Under: Homesteading, Recipes Tagged With: Jan Hodges

Chevre

February 10, 2010 by Kinder Goat Breeders Association

Two or three years ago I started making cheese. I started out with chevre, of course, and it has been a big success with people.

You need a good thermometer, that’s accurate and easy to use. I started out with a Polder probe thermometer. These have a digital read out and a cable, and a probe. They’re made for meat in the oven, but work really well for cheesemaking. The weak point of these is the probe, they quit after awhile, sometimes fast. I’ve tried three kinds now, and I wrap the connection of the cable and probe with that white stretchy plumbers tape. I think this helps the probe last longer, but they still are the weak point. (If you’re going to use the probe in a roast, be sure to take that tape off first). You also need a way to hang the cheese, I have a chain hanging from my ceiling over the sink.

I think most of the other equipment you need to make chevre can be found in most kitchens. Or you can substitute something.

You need a good 8 quart pot, stainless steel or enameled. Aluminum will not work.

Making chevre is really easy. You heat the milk up to 86 degrees, I do this on the stove, stirring constantly. Add the starter and a bit of rennet, stir it in. Let it sit overnight in the covered pot, and in the morning you have a curd. It needs to be over 70 degrees F, in the winter I put it in my oven with the oven light on. That’s all it needs to be warm enough.

You scoop off thin pieces of the curd with a slotted spoon, into a cheesecloth lined colander, and then hang the cheesecloth over the sink. Or you can put it in molds to drain. Let it drain 6-10 hours and you have chevre.

You need to make sure all the equipment that will touch the milk/cheese is sterilized. I boil water in a big pot and put everything in it. I also boil water in the pot I am going to warm the milk in, since I am not pasteurizing it. If you want to get a permit to sell chevre it has to be made from pasteurized milk, no matter where you are in the US, it’s a federal requirement. If you don’t usually pasteurize the milk you use at home and want the cheese for home use, I have had no issues with making it from raw milk. It keeps about a month, which is quite a bit longer than people say it will. My milk keeps at least two weeks, I never keep it longer than that, so I don’t know how long it actually keeps. I don’t intend to ever sell cheese, or milk either, so I don’t generally pasteurize any milk.

How long it keeps and to some degree how it tastes depends on how the milk is handled. Other things can affect the flavor, such as the individual goat, and perhaps also the breed of goat, and maybe the diet of the goat. If the milk tastes different the cheese will too. I have not noticed any difference in flavor or texture between pasteurized and raw milk. Lots of people, especially Americans, are terrified of “goatiness”. My chevre is not goaty at all. In France “goatiness” is desired. I think you have to cultivate a taste for it if it isn’t common in your culture. But “goatiness” is a feature, not a defect.

You can flavor it any way you want, I like to add red chili powder, granulated garlic, and a bit of cumin and salt, in between layers. Fresh basil leaves are good too, but fresh herbs limit the amount of time the cheese will keep to less than a week.

Chevre is very easy to make and hard to mess up. If you are just starting I recommend getting the chevre starter packets from New England Cheesemaking supply http://www.cheesemaking.com/. They contain a mesophilic starter and the right amount of rennet for a gallon of milk. After you have it down you can move on from there. I hear you can use buttermilk for a starter, but if you do you need to add rennet. The “rennet” in the grocery store isn’t the right stuff.

Next I will talk about my Camembert adventure.

Have a wonderful day!

Filed Under: Homesteading, Recipes Tagged With: Jan Hodges

Recipe Tuesday……….

January 26, 2010 by Kinder Goat Breeders Association

I had to think really hard to come up with a recipe for my final Recipe Tuesday blog post and have decided to share my favorite pancake recipe with you.  I hope you enjoy it. 

Goodwife Farm’s Apple Pancakes
  • 1 1/2 cups whole wheat flour
  • 1 1/2 tsp baking powder
  • 1 tsp salt
  • 1 1/2 cups goat milk
  • 1 egg
  • 1 TBSP canola oil
  • 1/2 apple, cored and chopped but NOT peeled
Add dry ingredients to medium sized bowl.  Mix wet ingredients except apples in measuring cup.  Add wet to dry, stirring just till combined.  Gently fold in apples.
Heat cast iron griddle til so hot that water drops sizzle merrily.  Drop batter on skillet by 1/4 cupfuls.  Cook, flip, and serve!  Makes about 12 pancakes.
I eat these topped with banana butter and they are delicious!  Very good, healthy, and filling!  Because I’m on Weight Watchers I put 3/4 cup of whole milk in my measuring cup, then add water to make 1 1/2 cup total.  If prepared this way they are 2.5 Weight Watchers points for 2 pancakes.
Till next time…………..GOD BLESS FROM GOODWIFE FARM!

Filed Under: Homesteading, Recipes Tagged With: Goodwife Farm

Recipe Tuesday………

January 19, 2010 by Kinder Goat Breeders Association

Blueberry Nutty Yogurt

  • 1/2 cup goat milk yogurt
  • 1 cup blueberries (fresh or frozen)
  • 1/4 cup grapenuts
  • 1 TBSP banana butter (or you can use 2 tsp sugar)

Heat blueberries till gently warm, top with yogurt, then add grape nuts and top with banana butter. Stir gently and enjoy.

This is soooo yummy! A sweet decadent treat and very good for you. For anybody else that’s on Weight Watchers it is 5.5 points per serving.

Filed Under: Homesteading, Recipes

  • « Go to Previous Page
  • Go to page 1
  • Go to page 2
  • Go to page 3
  • Go to Next Page »

Primary Sidebar

Subscribe to Notifications

Sign up to receive an email notification when a new post is published.

Check your inbox or spam folder to confirm your subscription.

Blog Categories

  • Breed Spotlight (51)
  • Guest Blogger (27)
  • Homesteading (25)
    • Recipes (17)
  • News and Announcements (80)
  • Showing (5)
  • The Healthy Herd (25)
  • Uncategorized (1)

Blog Tags

Artificial Insemination (1) Biosecurity (1) Conformation (25) Covenant Ranch (7) Dairy (3) Deworming (1) Election (20) Evaluations (1) Facilities (1) Goodwife Farm (8) Historic Kinders (1) Inbreeding (1) Jan Hodges (11) Jean Jajan (5) Kidding (2) Linebreeding (3) Management (1) Meat (4) Milk Test (7) Parasite Management (2) Showmanship (1) Shows (15) Sue Huston (11) Youth (1)

Contact the KGBA

kindergoatbreeders@gmail.com

© 2023 · Kinder is a registered trademark of the Kinder Goat Breeder's Association. All rights reserved.